HTML Kong
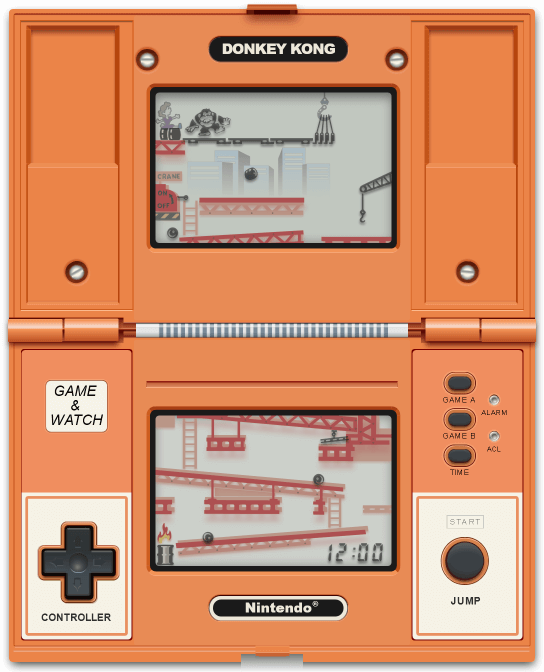
There are two things I’ve always wanted to try in HTML: generating a photorealistic image using CSS, and creating an interactive game without the need for JavaScript. HTML Kong is the end result of those two ambitions – a reproduction of the Game & Watch video game, Donkey Kong, using just HTML and CSS.
For those of you that haven’t heard of it, Game & Watch was a line of LCD handheld video games from the 1980s. The Donkey Kong title was probably one of the most popular in the series, selling more than a million units worldwide. The game was split over two screens and built into a distinctive clamshell casing.
Casing construction
My starting point for this project was with the construction of the casing in CSS. There is nothing particularly revolutionary about this procedure1, but it was a new experience for me. The basic structure of the body was formed with a set of div elements, then border and box-shadow properties were applied to control the colouring of the edges. For circular elements, a border-radius was used to adjust the shape appropriately.
When complicated colouring or shading was required, one or more layers of gradient were applied to the background property to produce the necessary effect (typically a linear-gradient). This part of the process was very much trial-and-error – some of the best results were achieved largely by accident – so I was quite pleased with how it turned out in the end.
Game screen backgrounds
When it came to rendering the background screens of the game, I decided to go with SVG, since that was another web technology I had always wanted to try out. I started by sketching the individual components as monochrome bitmaps in Microsoft Paint, then used an image converter from the Online-Convert website to translate those bitmaps into SVG paths.
Once I had an SVG path for each part of the screen, I manually coloured and combined those fragments, then added appropriate shading and filter effects to produce the final image. I had initially had a separate SVG for each of the screens, but once Chrome eventually agreed to support SVG stacks, it became feasible to merge the two images into a single file2.
Liquid-crystal display
As for the LCD elements of the game (Mario, Donkey Kong – basically anything that moves), the approach I took here was to create a custom icon font with each entity being a character in that font. This seemed like a perfect fit for LCD, since everything would obviously be a single colour, and I could then create the shadow effect that you get with an LCD just by applying a text-shadow property to the font.
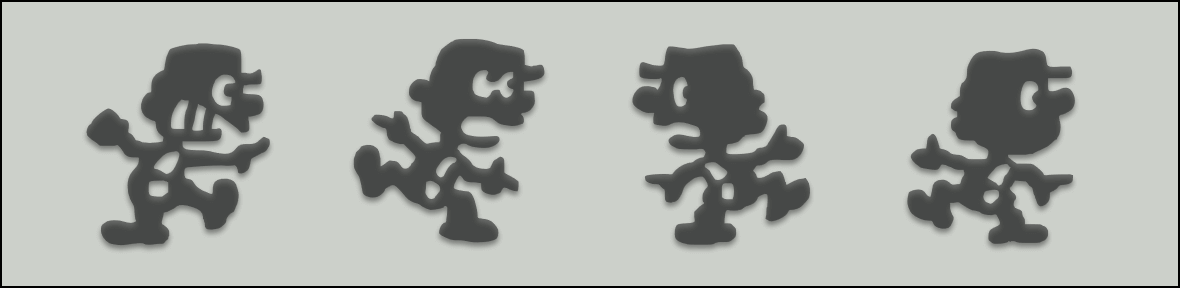
As with the game screen backgrounds, the glyphs were initially sketched as monochrome bitmaps in Microsoft Paint, then translated into SVG paths using the Online-Convert website. Once I had an SVG rendering of each glyph, I used the IcoMoon font generator to package them all up into an icon font, which could then be exported as a WOFF font file.
Mario’s movement
With all of the assets assembled, the first step towards making a playable game was to develop a mechanism through which Mario could be moved. This was achieved with a set of radio input elements corresponding to the various locations in the game, each linked to a div, which rendered Mario, via a :checked pseudo-class and a general sibling selector. The currently selected radio button would thus control the position and appearance of Mario’s div.
Navigating through the game could be accomplished by clicking on a label that targeted the radio button of the intended destination. When in position one, a label beneath the right arrow would target the radio button for position two. In position two, the label under the right arrow would target position three, while the left arrow targeted position one. The appropriate labels were activated via the currently selected radio button, in much the same way that Mario was positioned.
Barrel rolling
Simulating the barrel movement was somewhat easier. Each barrel location could be represented by a div with an appropriate sprite that turned on and off in sequence using a CSS animation. To keep things simple, the speed and frequency of the barrels never increased, nor did they stop on collision the way they would in the original game. This enabled the use of a finite set of keyframes which simply repeated forever.
To avoid a lot of repetition, most of the barrel locations shared the same set of keyframes, just with a different animation-delay on each of them. The top screen was a little more complicated, because the barrels could follow a number of different paths, but that still just meant an additional four keyframe sets. One of these low frequency sets was also shared by the iron girders moving overhead on the second level.
Collision detection
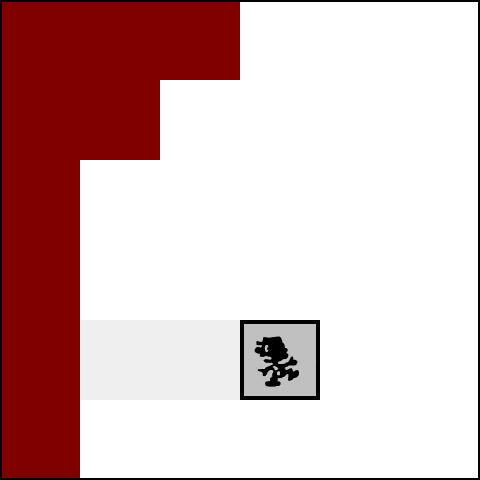
Detecting when Mario had been hit by these barrels was a little more complicated, though, since now it was necessary for the game to trigger a change of state, rather than simply responding to a player action. The way this was accomplished was with a kind of mechanical key constructed from a stack of floating div elements – these div elements were the teeth of the key and would push out a block of content aligned to the right of them3.
Using a CSS animation, the key was moved down the screen (invisible to the user) in sync with the barrels that were rolling towards Mario. At the time the first barrel would be expected to hit, one of the teeth in the key would move into place, pushing the content to the right and revealing a new rendering of Mario that indicated the hit. The same mechanism was used to push the movement labels off-screen so they couldn’t be used after a hit.
To synchronise the collision detection with Mario’s location, an additional padding was applied to the top of the key to move it further downwards in accord with Mario’s forward motion. One step forward moved the key one clock tick closer, since the barrels would be expected to hit one second earlier. This behaviour was triggered in much the same way as Mario’s sprite movement – via a :checked pseudo-class on the location’s radio button linked to the key’s div.
Timelines
Now in order for Mario to avoid this impending doom, we needed to introduce the concept of alternate timelines. In the initial timeline, Mario was expected to be hit by a barrel after five seconds, but by jumping that barrel, he would enter a new timeline in which a collision wouldn’t be expected for a further three seconds. These timelines were represented by additional radio button states with corresponding collision keys. The selected radio button would thus indicate both his location and his timeline.
Changing timelines – jumping a barrel – was simply achieved by clicking on an appropriate label positioned beneath the JUMP button. In some cases it might also have been one of the up/down buttons, if the barrel could be avoided by climbing a ladder. Since a separate label was required for each timeline and jump location, the easiest way to activate those label elements was with individual animations, synchronised with the barrels that would be expected in that timeline and at that location.
Other game mechanics
One last aspect of the game which I think is worth reviewing is the way the wire detachment works, since that makes use of a form of state persistence that hasn’t previously been discussed. When Mario reaches the top of the screen, he has to unhook one of the wires that are holding Donkey Kong up, then restart the level from the bottom again. We need to keep track of the number of times this has occurred so we can update the display appropriately, and ultimately trigger the animation for Donkey Kong’s fall.
Regrettably this was not something that could be stored as a radio button state, since that state would be lost the moment Mario took a step forward again. The trick was to use the final jump to trigger an animation for which the animation-fill-mode property had been set to forwards. Although the animation was started in response to a radio button selection, the fill mode ensured that any properties altered by the animation (in this case, hiding one of the wires) would still persist after the selection was removed.
Browser support
When I first developed this (early 2013), Firefox was the only browser that was even remotely playable. At that time Chrome still expected prefixes on animation properties4, and even then it was too buggy to use. It was only in recent months that enough of the issues had been fixed to make it a viable platform. It was also only recently that I was able to test on Microsoft Edge, and was pleased to find that I could get things working reasonably well with just a few tweaks.
The bottom line is if you’ve got an up-to-date version of Chrome or Edge, you should be OK, but Firefox is the only browser I would consider fully functional at this stage. In terms of playability, though, I found Chrome to be the most responsive, and that can make all the difference when rapid button pushing is required. I would also highly recommend a touch screen of some sort – physically tapping the buttons is a lot easier than trying to click on them.
Let’s play already!
To try it out for yourself, go to: kong.詹姆斯.com
You begin a game by choosing either GAME A or GAME B (there’s currently no difference between the two), then push the START button when you are ready for Mario to join in.
If you find this version disappointing, and are nostalgic for something closer to the real thing, check out the Flash implementation in the Pica Pic retro game collection. You’ll find many of the other Game & Watch titles there too.
Footnotes
- I think my first introduction to CSS art was a rendering of a MacBook Air, designed by Matt Boldt, back in 2012.
- This relied on SVG fragment identifiers in background images, which Chrome was initially reluctant to support.
- I’m glossing over a lot of the details here, but you can always look at the source if you want to know more.
- It was only last year that Chrome finally added support for unprefixed CSS animations.